21 Journey Images Suggestions (Secrets and techniques from the Execs)
Listed below are our greatest journey images ideas for learners and intermediates, based mostly on our expertise of going from full learners to skilled journey photographers, and now working within the business for 8 years.
Image this.
You lastly guide a visit to your final bucket record vacation spot.
Antarctica, Iceland, Namibia, Bali, seeing the Aurora Borealis – wherever it’s, you’ve waited your entire life to lastly go to.
Naturally you’ll wish to seize the very best journey images doable of this once-in-a-lifetime journey to share together with your family and friends members, on social media, and perhaps even print on the wall at residence.
Moments in time or a journey expertise that you simply all the time wish to cherish.
So that you’ve splashed out on a brand new digicam based mostly on skilled suggestions, and also you’re eager to hit the highway.
However right here’s the issue – you don’t have the faintest concept easy methods to get the identical sorts of photographs you see in postcards or on the web.
The sorts of journey images that simply pop, stand out from the remainder, encourage you to guide a flight instantly.
Fortunately that’s the place we are available in.
We’ve been lucky sufficient to work as skilled journey photographers for nearly a decade now, being paid to fly all over the world, operating images workshops, take footage for the tourism business and inform tales.
And now we wish to share our information, secrets and techniques and insights from our journey images journey with you so you possibly can take higher journey images.
On this submit you’ll discover lots of our favorite journey images ideas you’ll want to know to return residence with pictures you may be proud to indicate off.
Right now is the time to be taught. Let’s start.
Normal Journey Images Suggestions for Inexperienced persons
To begin with let me speak in regards to the basic journey images ideas that I really feel aren’t solely crucial, but in addition probably the most troublesome to grasp.
Creating an eye fixed for images takes time. Years the truth is. It’s a endless studying course of, however I promise you with observe you’ll get a lot better.
And when you begin to get the talents for framing and composing a shot, the remainder is simple.
1) Know Your Digital camera
Whether or not you shoot on a dSLR, mirrorless, smartphone or an previous movie unit, the primary journey images tip is to get to know your digicam gear.
No matter you could have in your digicam bag, take the time to learn the directions, mess around with all of the buttons and digicam settings, and spend hours with it in your hand in order that it turns into part of you.
Examine the menu in order that if you’ll want to change digicam settings within the area you’re not spending minutes scrolling by way of it when timing is vital.
Additionally don’t neglect to be taught your digicam’s limitations.
Does it carry out properly in low-light or does the picture crumble? Is it sharp huge open, or do you’ll want to cease all the way down to get the very best readability? Does it have inbuilt picture stabilisation?
In the end while you decide up your digicam you wish to really feel comfy and know precisely the way it works. Then getting higher footage will come sooner and simpler.
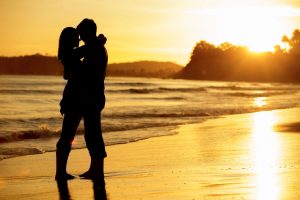
2) Concentrate on the Golden and Blue Hours
Mild is the whole lot with regards to journey images photographs, and there’s an excellent probability you’ve already heard in regards to the golden and blue hours.
The Golden Hour is that point when the solar is low within the sky and it throws a magical, heat glow throughout the scene.
Suppose the primary hour after the solar peaks within the morning, and the final hour or two earlier than the solar drops over the horizon within the afternoon.
The Blue Hour is when the solar is under the horizon and the sky provides off a good looking blue hue.
Should you really need higher journey images, the most effective journey images ideas we can provide is to get used to waking up early and keep out late to take advantage of these two instances of day.
Should you’re not a morning individual, get used to setting an alarm. Lots of the nice journey images of the Taj Mahal and different vacationer websites with nobody in them for instance have been taken by individuals who acquired there early.
Taking images in the midst of the day can nonetheless lead to nice pictures, however generally you’ll discover the blue sky too blown out except there are some attention-grabbing clouds, and on a sunny day you’ll discover the lighting circumstances could be a bit harsh.
As an alternative use the center of the day to get avenue images, or scout out photograph areas and a vantage level on your dawn and sundown images to return again later.
Bonus Tip – Even when it seems just like the dawn or sundown may not be so lovely, wait round. You by no means know when the clouds may break or the sky randomly lights up in good colors.
3) Plan Your Photographs
Earlier than you arrive in your vacationer locations, spend a couple of hours planning out your shot record of photographs you wish to {photograph}.
You will get inspiration from Instagram, Google Maps, journey guides, magazines and extra.
Make an observation of those footage, after which plan your day across the optimum time to shoot (dawn or sundown for instance).
Doing this may provide help to nail the pictures you wish to go, and provide you with extra function and route.
It’s essential to know that all the greatest photographers use instruments like Google Maps or social media to kind a shot record, and it is best to get used to it too.
4) Study About Composition
You’ve most likely heard about how essential it’s to compose a shot correctly, and I wager for those who’ve ever learn a images handbook you’ll have come throughout the ‘rule of thirds‘.
Good composition could be the distinction between a median shot and award-winning journey images.
There’s all types of ‘guidelines’ that theoretically make a photograph look nicer, comparable to not placing your topic in the midst of the shot, don’t reduce parts out of the body, and many others.
However proper now let’s go a bit into the Rule of Thirds.
This idea is the place you divide your picture into 9 even squares (many cameras even have this grid line function constructed into their show choices).
Then what you do is you place the themes and factors of curiosity comparable to a human component alongside these traces and squares.
Right here’s an instance of how this seems:
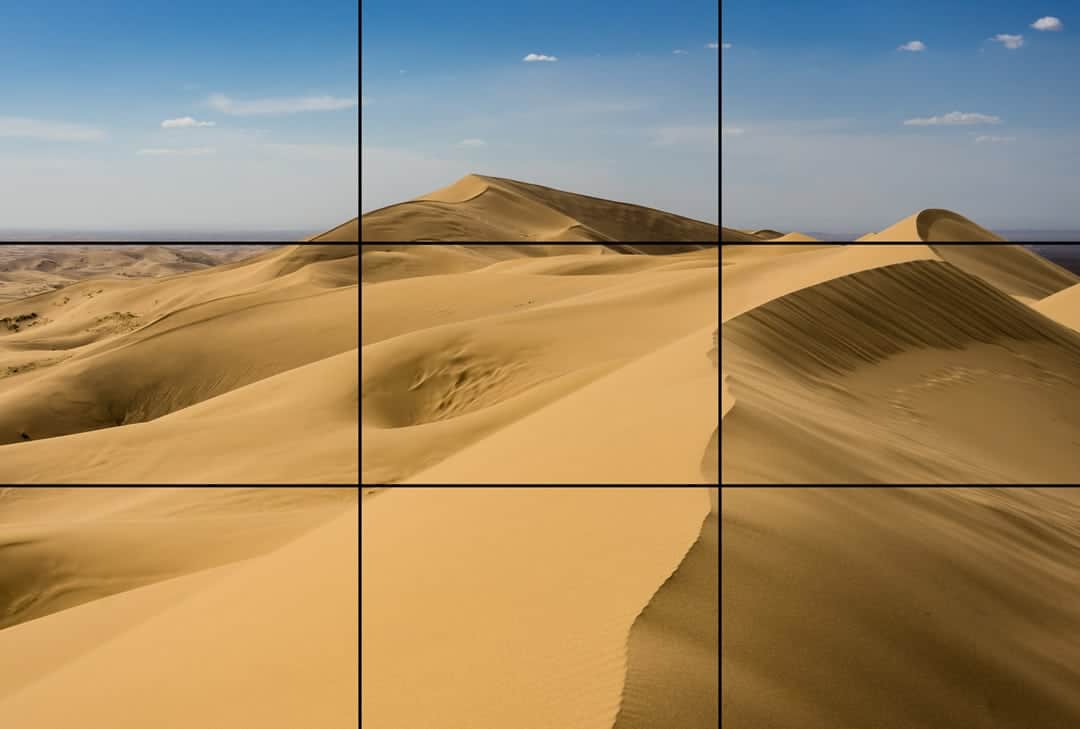
The thought of the rule of thirds is that it is a mathematical concept of what our eyes naturally discover pleasing. So it’s good observe to include this methodology into your pictures.
One other factor to search for is main traces that naturally draw your eye across the photograph, in addition to totally different angles and shapes.
Have a river flowing from the aspect of the shot as much as a waterfall on the highest left for instance, or the foreground bending round, main the attention in direction of a church on the prime of the photograph.
This can be a ability that you simply’ll be taught with extra observe.
An essential factor to recollect is that guidelines are supposed to be damaged.
Get used to analysing your pictures with the rule of thirds, however please don’t use it as gospel for those who assume a unique composition would work.
Including a human component additionally brings numerous curiosity to an excellent shot, so place individuals in your body.
5) Framing, Framing and Extra Framing
Once you look by way of the viewfinder or LCD display screen, don’t simply concentrate on the topic.
Be sure you run your eyes across the whole body to be sure you’re not unintentionally reducing off one thing essential.
Double-check that the highest of a mountain is absolutely contained in the body, or that your pal’s entire physique is within the shot for example.
This isn’t gospel, as a result of typically having one thing reduce off from the body could be good for composition, however you’ll need to be the choose of that.
Additionally test to see if you need to use one thing pure within the scene to create a body inside your image.
Consider looking a window at a constructing, or a bent-over tree surrounding a reasonably lake.
These can all assist make higher journey images.
6) Transfer Your Ft
This is likely one of the most essential journey images ideas I can provide – Transfer your toes.
Don’t simply arrive to a scene and take a shot from the place you’re standing.
As an alternative take a couple of minutes to stroll round and see if there’s a higher body or composition.
Go nearer, transfer again, step to the aspect, think about your lens’ focal size, and many others.
Think about attempting to take that iconic Taj Mahal photograph, solely to search out out later that you simply have been 2m to the left of centre, throwing off that good symmetry.
Or perhaps for those who stroll to the river’s edge you’ll have the ability to incorporate some attention-grabbing rocks into the scene as an alternative of simply water.
Higher but, take a number of journey images and refill these reminiscence playing cards from the identical photograph areas so you could have numerous choices while you get residence to see which is your favorite.
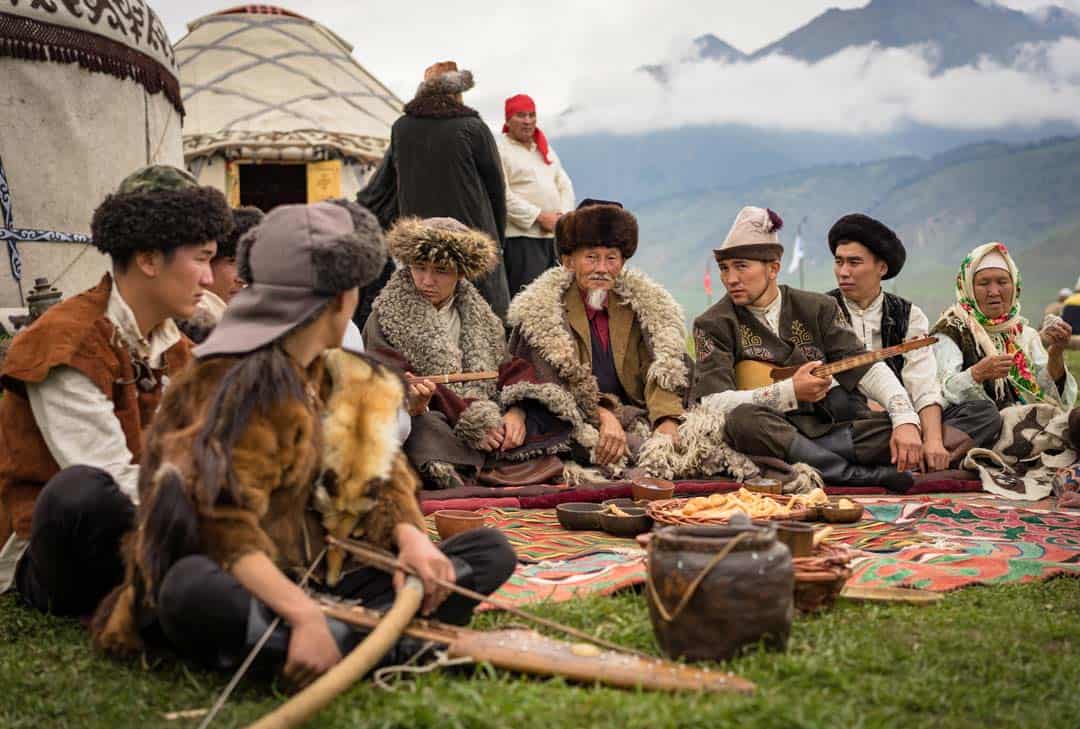
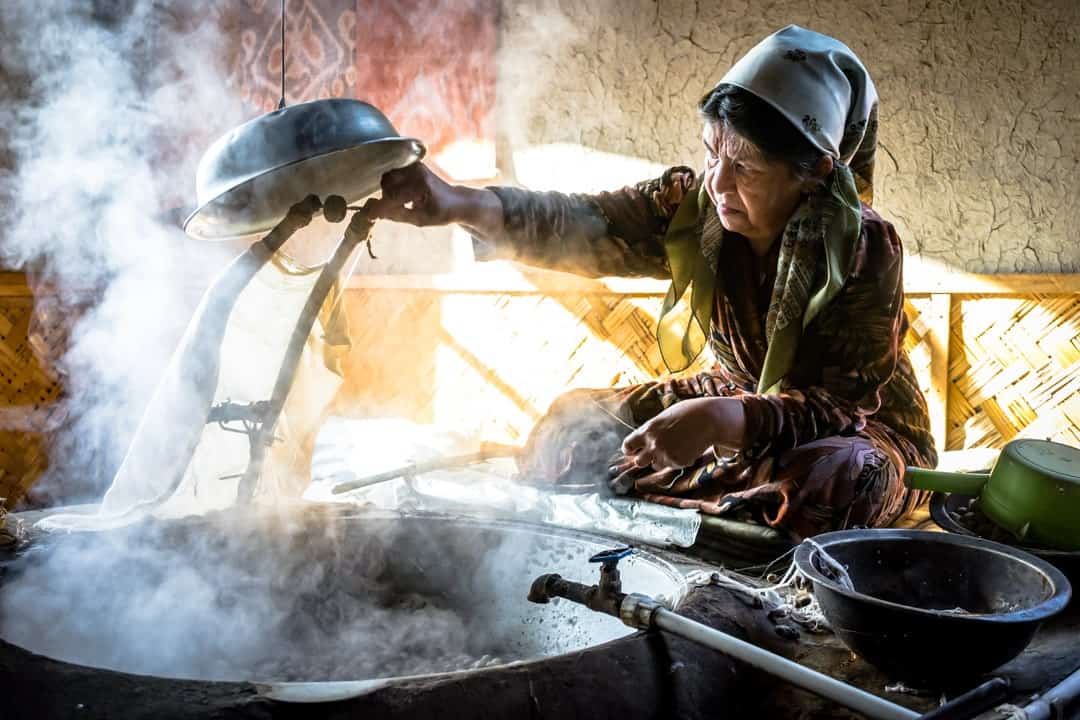
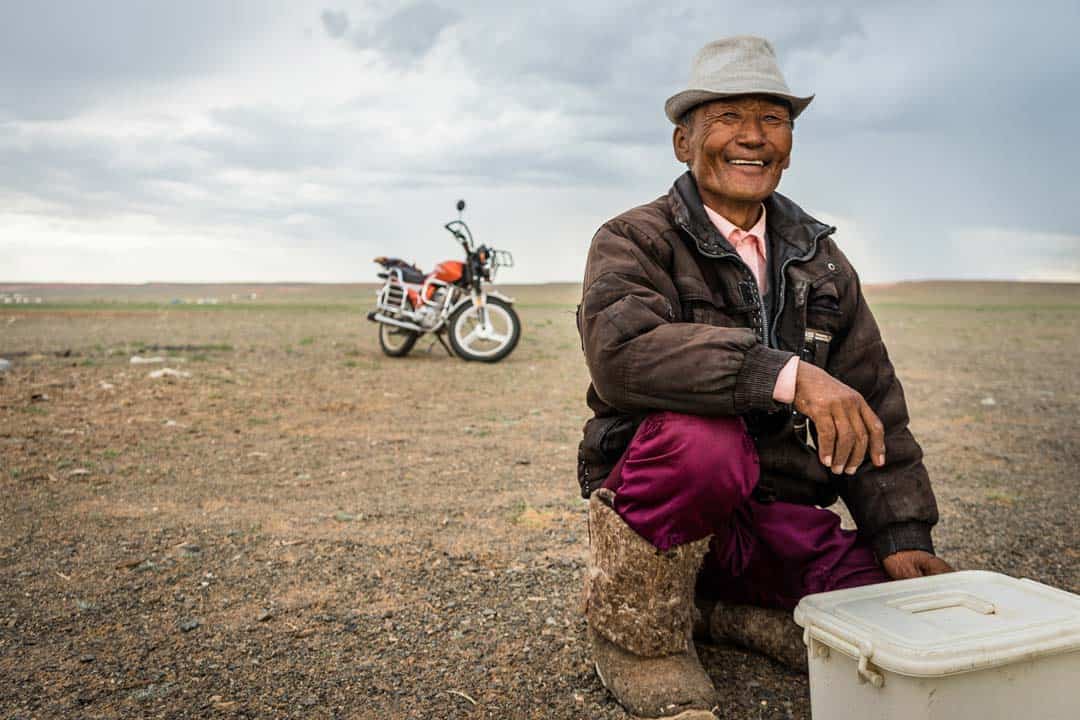
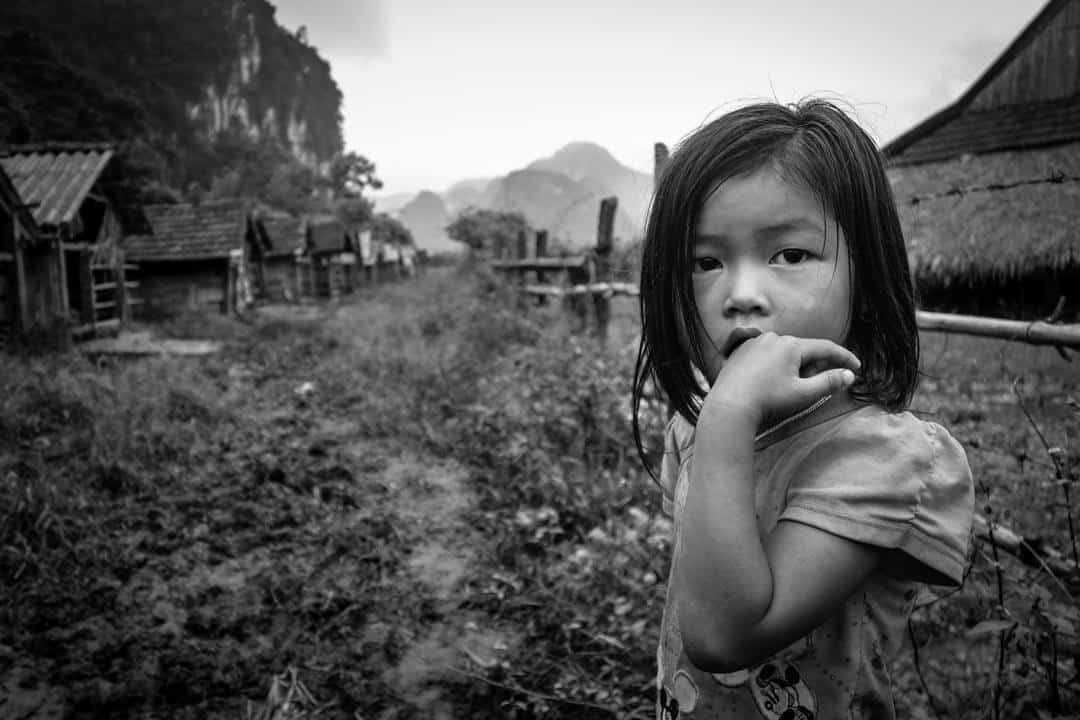
7) Ask Individuals for Permission
Journey images isn’t all about capturing probably the most lovely sunsets and lovely structure all over the world.
Journey images can also be in regards to the individuals you meet. However for those who’re a bit shy like me, how do you get these wonderful portrait images with out feeling impolite?
Easy – simply ask for permission.
Asking somebody for permission to take their photograph is well mannered and respectful.
If in case you have had an excellent encounter with somebody, otherwise you simply see an excellent alternative and wish to seize an exquisite portrait, give them a giant smile and ask if it’s okay to take their photograph.
You’ll discover many individuals are very happy to pose for a photograph for those who simply ask (simply be sure you respect them if they are saying no).
However what if you wish to get a candid shot, with the topic wanting pure?
There’s all the time one other technique to get these with out annoying the individual.
Don’t make it apparent that you’re taking their photograph. Act pure and take numerous images of the atmosphere round them.
You can too maintain your digicam down by your aspect and level the lens of their route.
If in case you have a zoom lens, use it. This was you could be on the opposite aspect of the road or market and nonetheless {photograph} the individual.
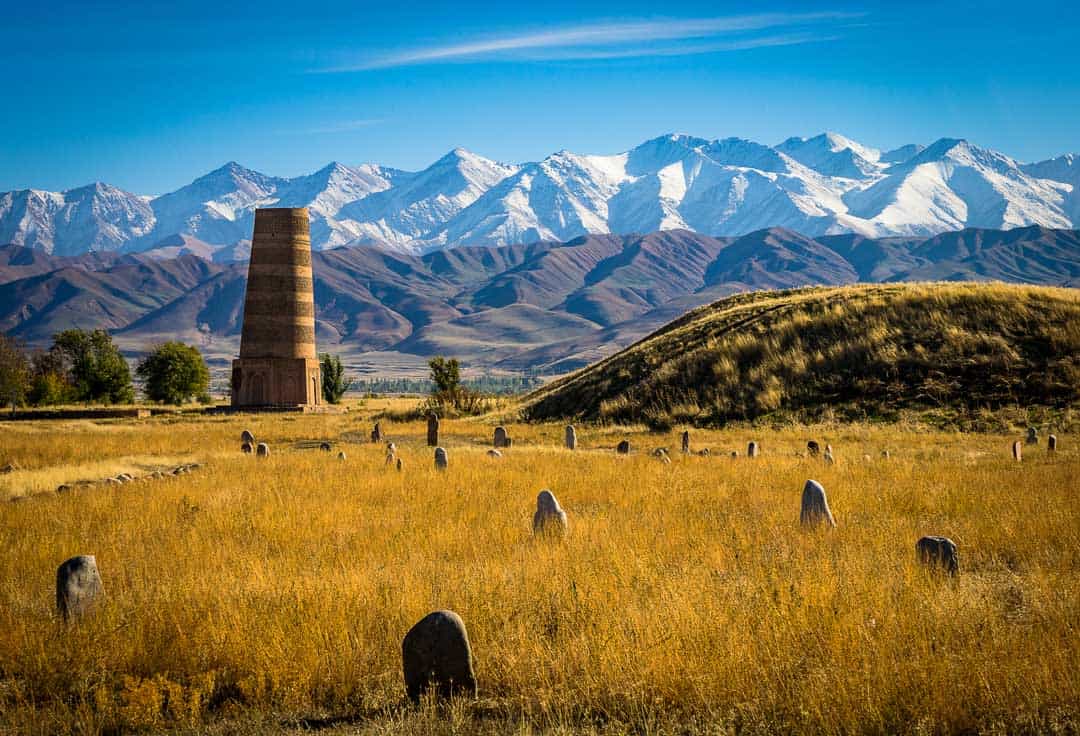
Enthusiastic about studying extra? Be a part of one in every of our unique images workshops in Antarctica, Kyrgyzstan, Tajikistan or Mongolia!
Make Them Really feel Comfy
One other one in every of my favorite journey images ideas for portraits is to herald one other component to the shot.
Some individuals will really feel uncomfortable posing for a stranger, but when you can also make it about one thing else they’ll really feel far more relaxed.
For instance, perhaps ask if they’ll pose with one thing of their retailer like a rug, or ask them to indicate you their marriage ceremony ring.
This fashion they’ll realise there may be extra to your photograph than simply them. This will even add much more attention-grabbing parts to the shot!
8) Use a Tripod
A tripod is likely one of the greatest digicam equipment you possibly can have in your digicam bag, and actually important for journey images.
This may permit you to get glorious pictures in low mild, in addition to get artistic together with your photographs (like taking lengthy exposures).
Lately you don’t all the time want a large tripod to journey round with, particularly if you wish to journey mild and are a hobbyist photographer. Take a look at among the Joby Gorillapods.
One other benefit of utilizing a tripod is that it’s going to drive you to decelerate together with your images and put extra thought into every shot.
Somewhat than simply pointing and capturing, you’ll consider carefully about the place you wish to arrange your tripod and the way you wish to compose your shot.
Truthfully if you wish to grow to be a greater journey photographer, you’ll must spend money on no less than a small tripod.
9) Discover the Proper Journey Images Gear
You don’t must exit and spend tens of hundreds of {dollars} on new journey images gear to get the very best pictures.
In actual fact chances are high you have already got a superbly satisfactory digicam proper subsequent to you (your telephone).
As an alternative simply get what you an afford, and as you develop together with your images model, submit manufacturing, and many others, you’ll be taught what digicam gear you want as properly.
Issues like filters, tripods, flashes, prime lenses, zoom lenses, and many others will are available in time.
For now, all you actually need is a digicam, reminiscence card and enthusiasm!
Take a look at our suggestions for the very best journey tripods.
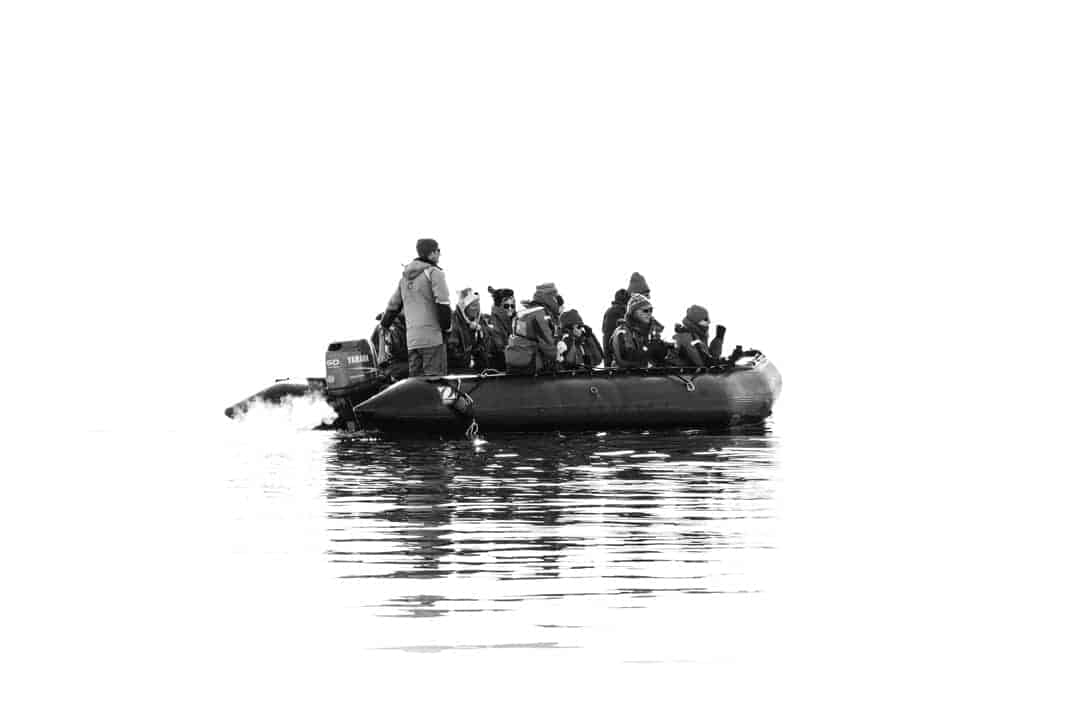
10) Be Distinctive
There’s nothing fallacious with getting these iconic pictures of the Eiffel Tower or Machu Picchu to share on social media.
They’re lovely and are sometimes wonderful digicam angles of well-known locations that everybody desires to go to.
However don’t neglect to be distinctive as properly! Discover a totally different perspective that hasn’t been photographed 1,000,000 instances.
In actual fact make it your aim to get a couple of distinctive pictures that you could be happy with.
Over-expose, under-expose, incorporate movement blue – the one limitation is your creativeness!
11) Discover Your Voice as a Photographer
Identical to a author or musician finds a selected model they like, as a photographer you’ll want to uncover your ‘voice’.
Journey images is such a broad time period that may cowl absolutely anything.
Actually simply taking any journey images will match the outline, whether or not it’s panorama images, wildlife images, structure, portraits, meals or no matter.
Simply discover a model you like most, and concentrate on getting higher at it.
Should you actually like black and white images, then begin capturing in black and white! Love taking photographs of loopy avenue markets? Then get on the market and discover them!
Experiment, be taught, uncover and nurture!

Technical Journey Images Suggestions
Whereas the technical aspect of utilizing a digicam is often probably the most overwhelming factor for a brand new photographer to consider, it’s truly one of many best issues to grasp. All it takes is a little bit of research and observe.
Should you’ve by no means appeared into getting out of ‘Auto mode’ in your digicam, then phrases like ISO, aperture, white stability and shutter velocity will appear utterly overseas.
READ MORE: Take a look at our nice article and weblog posts that includes our greatest panorama images ideas!
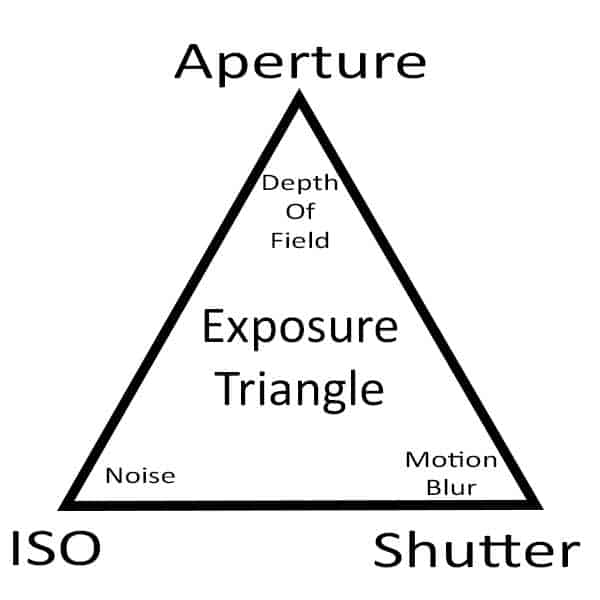
12) Publicity Triangle of Images
The Publicity Triangle is a metaphor to clarify the three parts that permit mild onto a sensor.
A digicam captures mild, and the correct quantity is required in order that your picture isn’t too brilliant or too darkish.
The three elements of the Publicity Triangle are aperture, ISO and shutter.
Every one impacts how mild reaches the sensor in numerous methods, and getting this mix proper is crucial to capturing a good looking picture.
If you’d like extra info, I’ve put collectively this complete information to understanding the publicity triangle which it is best to actually try.
For now although I’ll clarify these three issues briefly, and the way they relate to taking higher journey pictures.
13) Aperture
Aperture is how huge, or small, the blades in your lens are and the way a lot mild goes by way of the lens.
The aperture measurement is measured in ‘F Stops’, and displayed as numbers. f5.6, f8, f11, f16, and many others
A large aperture (small quantity – f1.8) allows extra mild than a low aperture (huge quantity – f22).
A large aperture additionally has a shallowed depth of area than a low aperture. I do know it may be a bit complicated, however you’ll decide it up the extra you mess around with it.
If you’d like the background blurry in your photograph, you’ll desire a huge aperture. If you’d like the whole lot in focus, you’ll desire a low aperture.
14) ISO
ISO is how delicate your digicam sensor is to mild. A small quantity, comparable to 100, means it’s not very delicate and subsequently wants extra mild to depart an impression.
A excessive quantity, like 6400, means it’s very delicate and desires solely a bit bit of sunshine to indicate up on the sensor.
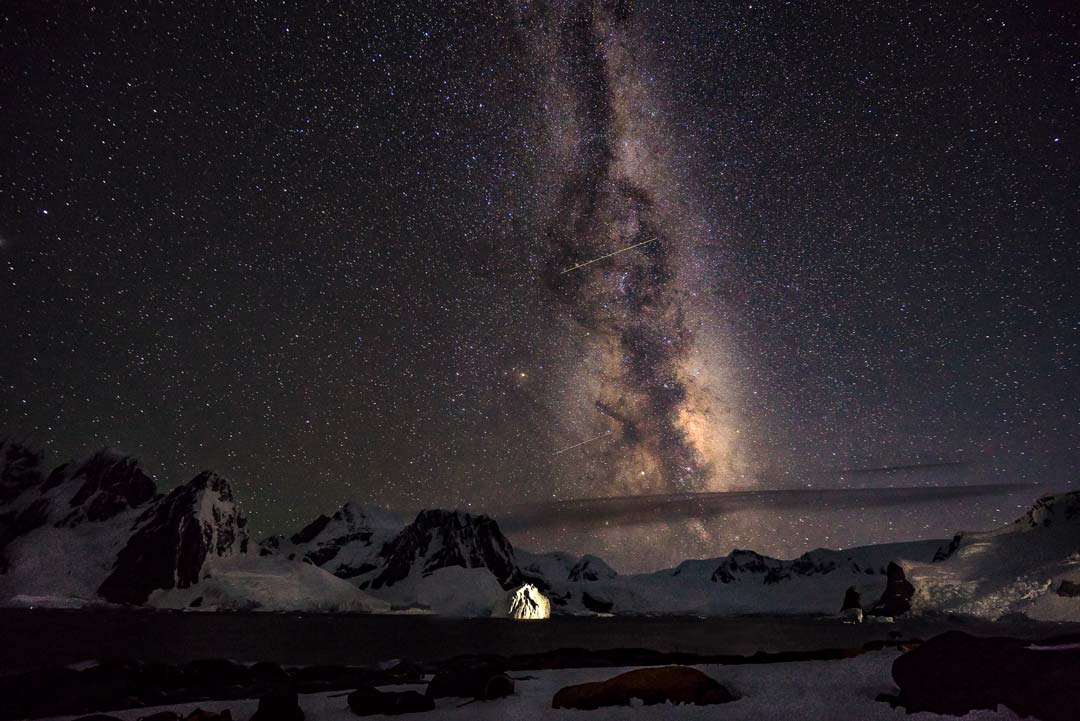
The upper the ISO, the extra noise reveals up in a photograph. Noise lowers the standard of your picture, so in an ideal world you’ll wish to maintain this as little as doable (except you’re going to remain out late doing astro and night time images).
It’s additionally essential to lift your ISO for those who’re capturing transferring topics (or handheld) indoors.
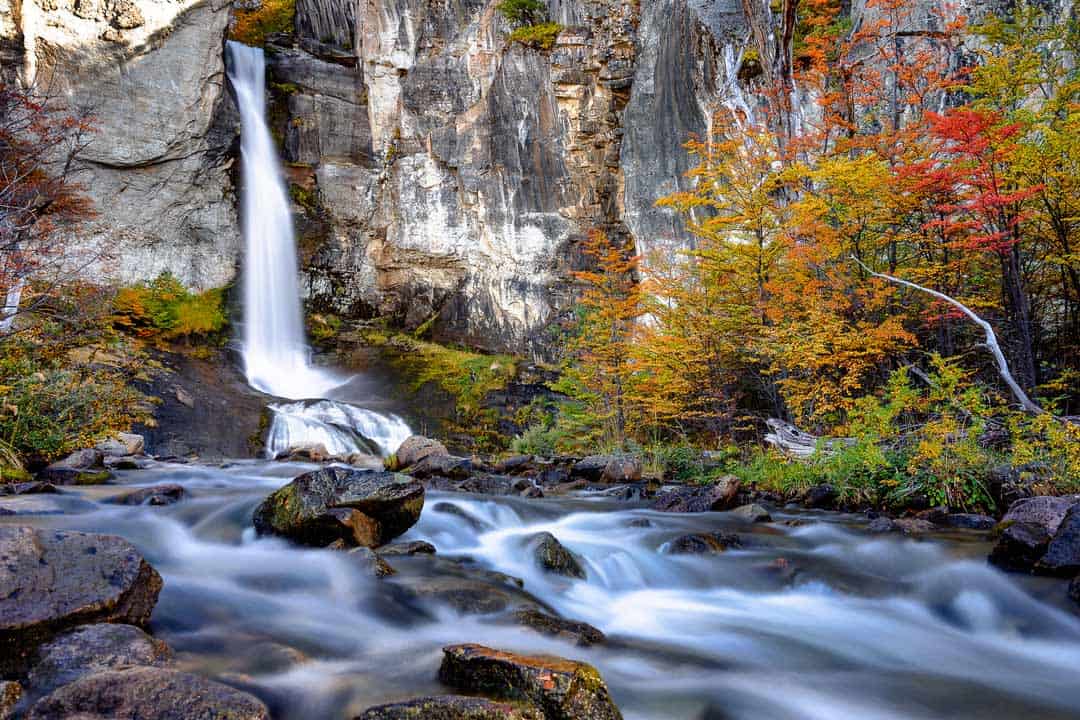
15) Shutter Velocity
Shutter velocity is fairly straight ahead – how lengthy it takes on your shutter to open and shut. This lets you freeze a body, or introduce movement blur.
Need to seize a fowl in flight? You’ll wish to have a quick shutter (1/4000th of a second for instance).
Need to make a waterfall look silky clean, such as you see in a lot Iceland images? Go for gradual shutter speeds (3 seconds for instance), and take a look at our information to waterfall images ideas whilst you’re at it!
Take into account that in case you are holding your digicam gear fairly than utilizing a tripod, you’ll must have a quick sufficient shutter to remove your personal hand motion.
As a basic rule 1/60 of a second is the slowest it is best to go so your image doesn’t decide up hand motion. Any slower than that and also you’ll most likely want a tripod.
16) Combining All Three for Good Publicity
There isn’t a ‘good setting’ for aperture, ISO and shutter. All of it depends upon what you are attempting to {photograph} and the model you’re going for.
Fortunately most first rate digital cameras have two little instruments that may allow you to mess around determine how all three work collectively – handbook mode and histograms.
Handbook provides you full management over your digicam’s ISO, aperture and shutter.
Should you change one, nothing else will change, in contrast to in ‘aperture precedence’ mode or ‘shutter precedence’ mode.
The histogram is a visible show of sunshine. When the bars are all the way in which to the left, the picture is darker. When they’re all the way in which to the fitting, the picture is lighter.
When a lot of the bars are within the centre, that is completely uncovered.
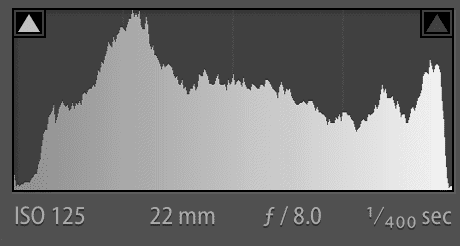
One of the best ways to determine what combos work greatest while you’re a whole beginner is to place your digicam on “handbook” mode, activate the histogram, and mess around with the settings.
Decide an aperture (f/8 for instance) and level it on the scene. Now have a look at the histogram.
If the picture is simply too darkish, then you definitely’ll must let extra mild in. Let’s make the velocity slower. See a change?
Now put the shutter again to the place it was and as an alternative change the ISO. Make the ISO larger. Is the picture getting lighter?
Spend an hour or two enjoying round with totally different apertures, ISO and shutter so that you get an concept of how every one impacts the sunshine hitting the show.
Take word at how drastically issues can change if a cloud goes in entrance of the solar, otherwise you take the digicam inside.
This simply comes with observe after all, and realizing what settings you need for a selected scene will grow to be second nature
Take into account that not all journey images must be completely uncovered. Typically having a darker picture seems a lot better than having one that’s good and brilliant. You should use your judgement for this.

17) Bonus – Normal Concepts For Digital camera Tools Settings
That is very, very fundamental and not at all needs to be learn as gospel. There are 1,000,000 various things that may have an effect on why you’ll desire a sooner shutter, or wider aperture. However in case you are confused about what to select for what right here’s a fast concept.
- Landscapes – You’ll need your aperture round f8-f11. You’ll additionally need your ISO as little as doable. Decelerate the shutter accordingly.
- Portraits – You’ll most likely wish to {photograph} your topic to be sharp, however the background blurry to deliver concentrate on the individual. Have a wider aperture (say f2.8 for instance), and a sooner shutter (round 1/160 on the absolute slowest) to freeze the topic. Regulate ISO accordingly.
- Indoors – As a result of it’s darker inside than exterior, you’ll must let much more mild into the sensor. Until you’re utilizing a tripod, maintain the velocity at round 1/60 because the slowest, and the aperture round f5.6 to start out with. Regulate ISO and aperture accordingly.
After all there’s a bunch of different kinds of journey images that may use totally different settings, comparable to astrophotography, structure, avenue scenes images, wildlife images, and many others.
In time you’ll be taught what settings work greatest for every scene.
18) Use Handbook Mode
One of the best ways to get to know your digicam and the way mild works is to have full management over what settings you select.
The one manner to do that is to shoot in handbook mode (proven by the letter M on most cameras).
It should take months of observe, however I promise you that in time you’ll have the ability to have a look at a scene and immediately know what aperture, ISO and shutter to make use of to get the precise model of picture you’re searching for.
You can too use aperture precedence mode (the letter A in your digicam) for those who don’t wish to make the large leap to handbook simply but.
This fashion you possibly can lock within the aperture you need (f8 for panorama images, f2.8 for portraits, and many others) and the digicam will mechanically modify the ISO (though you possibly can management this half too) and shutter to get good publicity.
I extremely suggest specializing in studying handbook settings although till you could have it perfected.
19) Shoot in RAW (if accessible)
Once you take a photograph in your digital digicam, the pc chip inside it takes what you captured on the sensor and converts it right into a format that may be simply learn. For many cameras, these two codecs are RAW and JPEG.
JPEG is a compressed format that the digicam creates to avoid wasting on area. In doing so it ‘locks in’ all the info that it picked up comparable to the color and white stability.
RAW recordsdata truly saves all the info of what you took and doesn’t compress it.
Most first rate digital cameras will provide you with the menu possibility of capturing in RAW, and I like to recommend you employ it for those who ever plan on enhancing your images.
Take into account that the file sizes shall be quite a bit larger (for instance on one in every of our cameras a RAW is 42, whereas a JPEG is simply 20), so that you’ll must have additional reminiscence playing cards and exterior onerous drive storage.
If in case you have no plans on enhancing your images then shoot in JPEG.

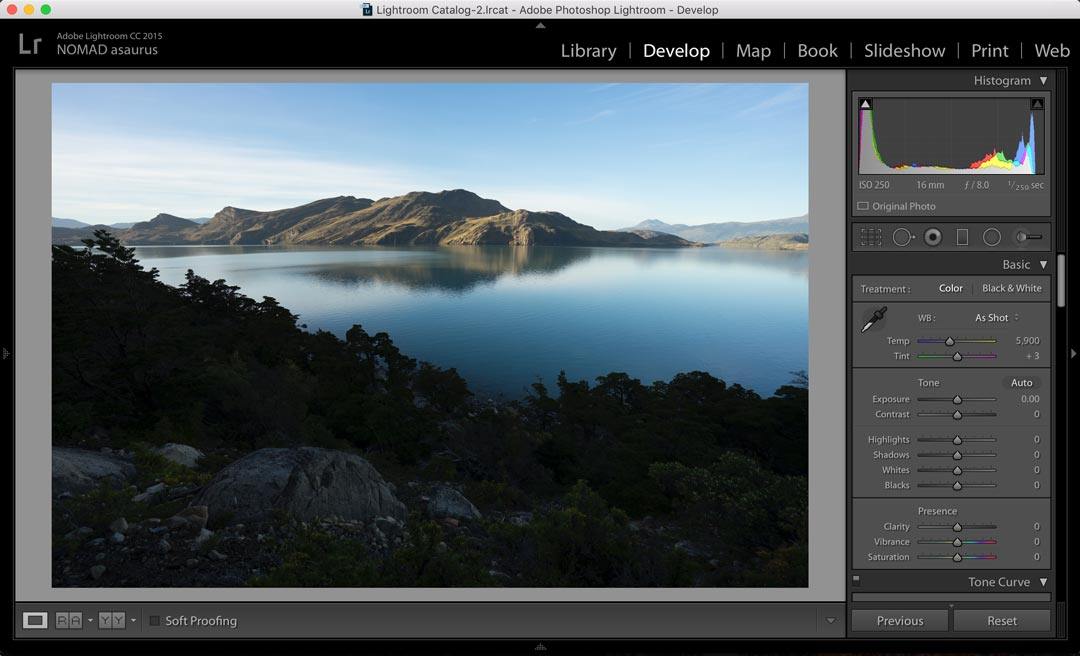
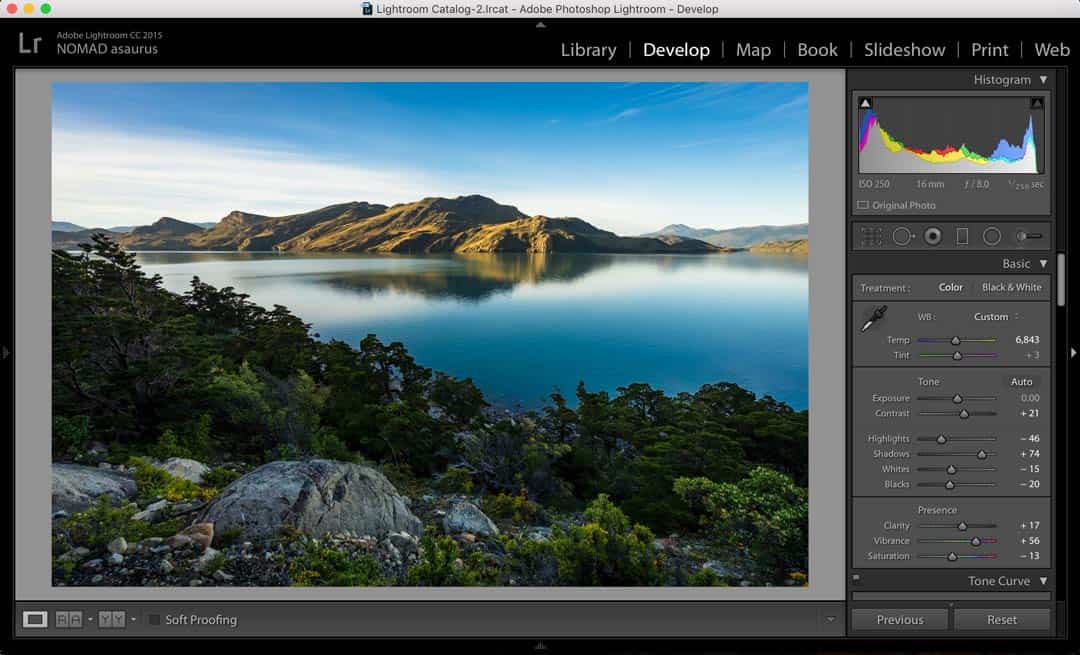
20) Study About Submit Processing
Some individuals assume that enhancing your photograph is ‘dishonest’. However the reality is photographers have been enhancing their images ever since images was invented.
Sure, even your favorite images in Nationwide Geographic have been manipulated not directly.
99% of images you see in your favorite journey magazines have been edited. Each skilled photographer edits their images to a point.
The reason being that not all cameras are nice at capturing precisely what the attention noticed when it comes to color and lightweight.
Should you actually wish to get probably the most out of your skilled journey images enterprise, it is best to begin enjoying round with submit processing.
Many individuals have heard of Adobe Photoshop, nevertheless it’s a reasonably superior instrument that most individuals wouldn’t ever want to make use of (till you get extra expertise).
To begin with have a look at the free apps that you could get in your telephone, comparable to Snapseed, or free enhancing applications in your laptop, like iPhoto or GIMP.
When you get severe about journey images and also you wish to begin enhancing all your images which might be filling up your reminiscence playing cards and exterior onerous drive, we suggest buying Adobe Lightroom.
Should you’re able to make the bounce to utilizing Lightroom and Photoshop, Adobe have an excellent ‘Artistic Cloud’ bundle, which is what we use for less than $10 a month. You should purchase it right here with a 7-day free trial
21) Apply, Apply, Apply
Identical to something, turning into an excellent journey photographer takes time, and numerous observe. The one manner you may get higher is by getting on the market taking journey images!
You don’t even need to journey the world to vacationer locations or have probably the most journey digicam accessible to be an excellent photographer.
Borrow some members of the family to take their portraits, get a pal who can also be inquisitive about images and push one another, or seize your smartphone and go shoot sundown.
Purchase no matter you possibly can afford, go for a stroll round your metropolis and snap away.
We hope that this basic information on journey images ideas for learners has been useful.
Please be happy to achieve out to us when you have another questions. We have now numerous expertise working with tourism boards, and can be completely happy that will help you too.
Good luck in your photographic journey, and perhaps we’ll see you in Nationwide Geographic sooner or later!
DISCLAIMER: A number of the hyperlinks on this article are affiliate hyperlinks, which suggests for those who guide lodging, excursions or purchase a product, we are going to obtain a small fee at no additional value to you. These commissions assist us maintain creating extra free journey content material to assist individuals plan their holidays and adventures. We solely suggest the very best lodging, excursions and merchandise that ourselves or our incredible editorial workforce have personally skilled, and usually evaluate these. Thanks on your assist, variety pal!
Save this Pin for later?